Welcome to the iPeer Onboarding Guide!
We are excited to partner with you on your journey to better data visibility, more empirical decision-making, and more efficient workflows!
Please follow these self-guided steps to start enjoying the benefits of iPeer, and please don't hesitate to reach out if you'd like some assistance for any reason.
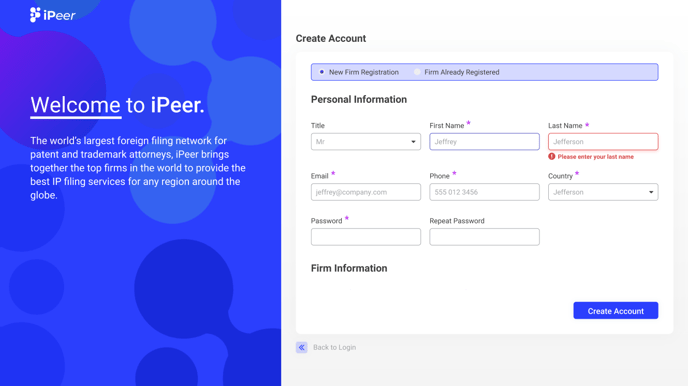
Create an account
Head to iPeer.ai/register to create your account.
If your organization is new to iPeer, enter your personal information as well as your organization's information. iPeer will work better if you use your professional email address instead of your personal email address.
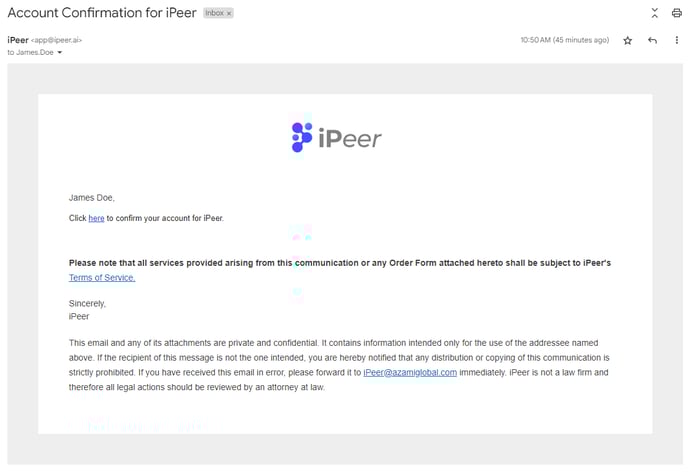
After submitting the form, check your email for the confirmation message. You'll need to click the link in your email to confirm and activate your account.
Next you will be prompted to log in. Once this is done, you will be able to view iPeer.
Invite Your Colleagues
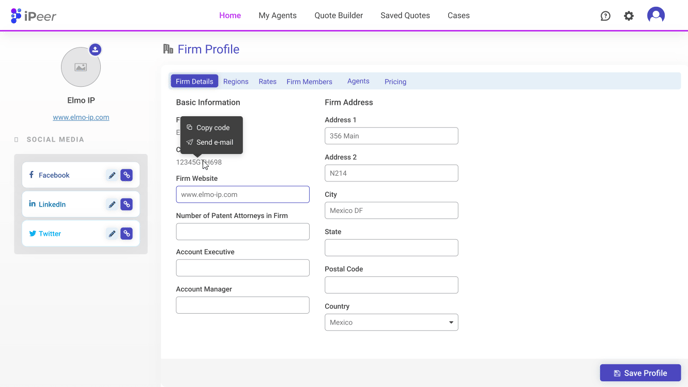
From the dashboard, click on your avatar in the top-right corner. Click to open your firm profile.

Hover over your firm code, which is visible on the Firm Details tab. Choose to either copy the code to your clipboard for sharing or to email the code directly to your colleagues.

If you choose to send an email, you will be given the opportunity to add as many recipients as you'd like.
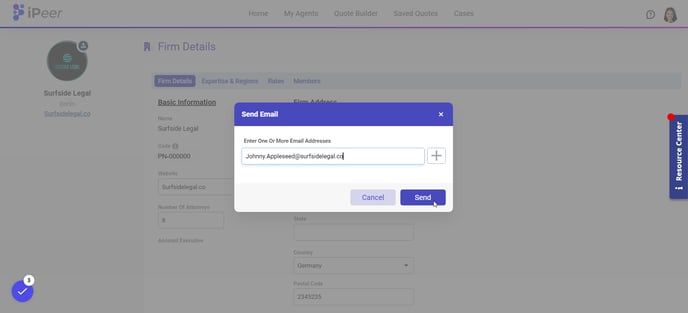
Each specified recipient will receive an invite to join iPeer via email.
Add your Agents
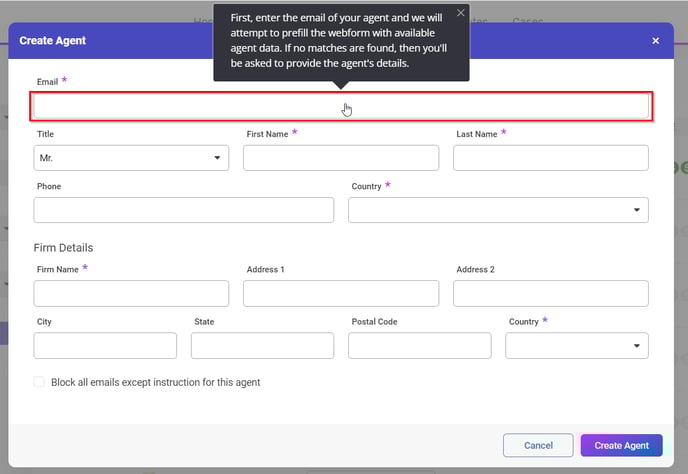
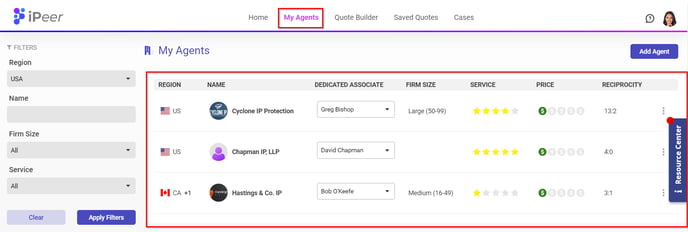
To view or add to your list of agents, click the My Agents link in the top navigation bar. Click Create Agent to add an agent to your profile.


To view or add to your list of agents, click the My Agents link in the top navigation bar. Click Create Agent to add an agent to your profile.
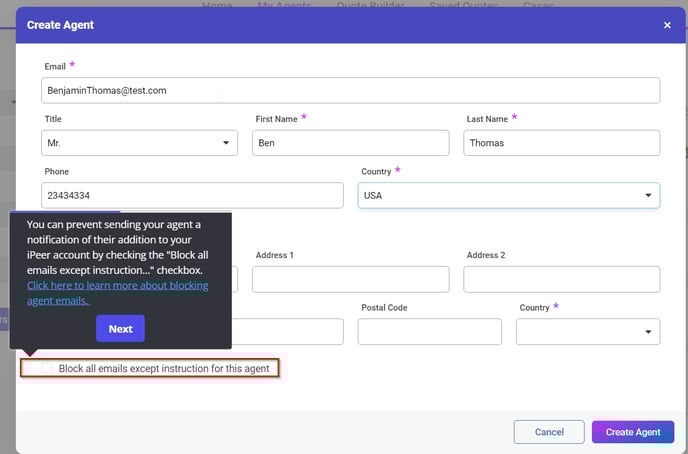
Enter the email of your agent first, and we will attempt to prefill the webform with agent data. Once the form is complete, click Create Agent. This action will add the agent to your profile, as well as send an email to your agent notifying them that you added them to iPeer.
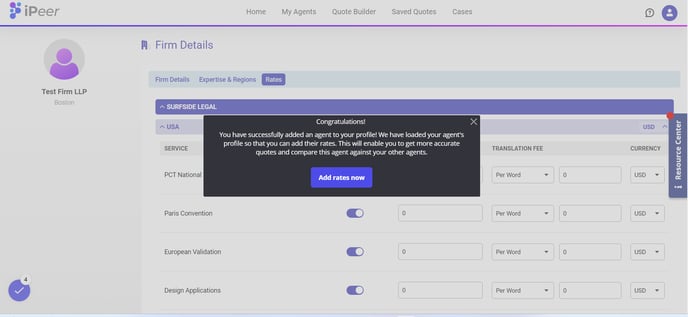
 Next, your new agent’s profile will open to let you enter the agent’s rates. You can come back to this screen at any time to update rates. Both client and agent will be notified every time a relevant rate is updated.
Update your Agent's Rates
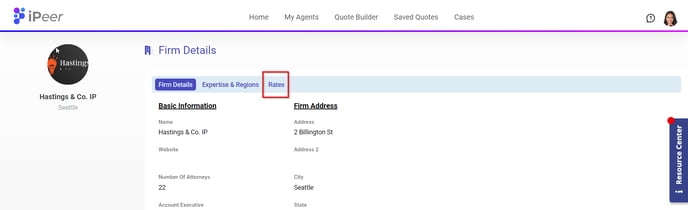
To update your agent’s rates, you will need to load their rates in their profile. If you have not done so already, click on the desired agent firm’s name in your agent list.
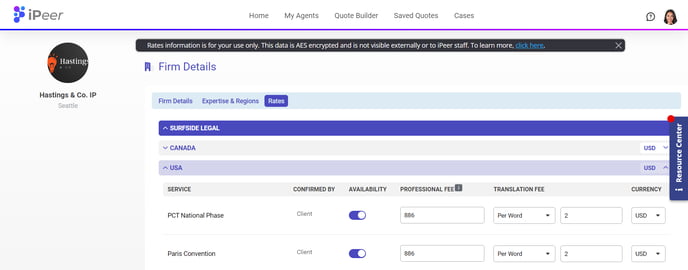
Once the agent’s profile is loaded, click on the rates tab. If your agent operates in more than one region, you'll need to choose a region to view and edit rates. Edit rates as needed and click Save when finished.

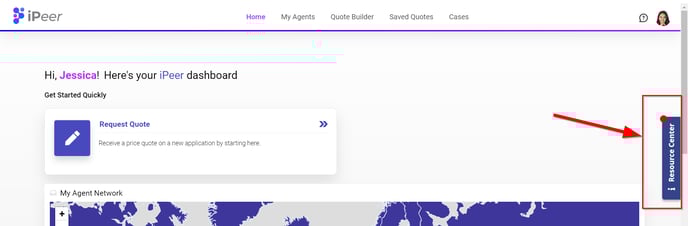
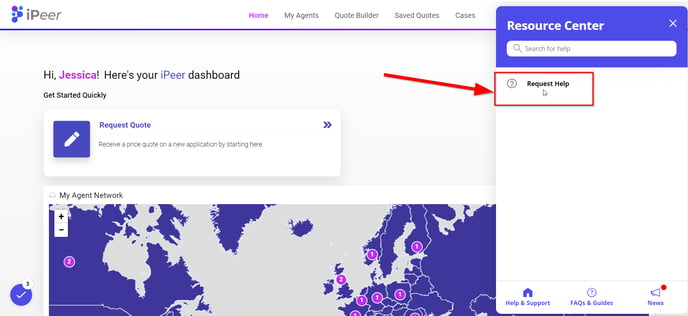
Would you like some assistance?
We are happy to help in the onboarding process. If you'd like to request assistance, please let us know by contacting us in your Resource Center: